Dwain's "Big O" High Power Rocketry Project
Project Start: May 2010
Flight Date: 23 October 2010
See the launch video on You Tube


One evening back in May 2010 I was over at Dwain's place for a little get together of the creative kind. Whilst imbibing in some tasty beverages, Dwain pitched the idea of building a rather large rocket capable of handling a Cesaroni 150mm (six-inch) 'O' motor. Dwain outlined the general layout: 16-inch diameter airframe; roughly 26 feet long; three Nike-style fiberglass fins. I was easily hooked on the project but I was sold once he told me the proposed name for the rocket: The Big O. Project partner Rick M. jumped on board and offered up shop space for the construction of this proposed beast.

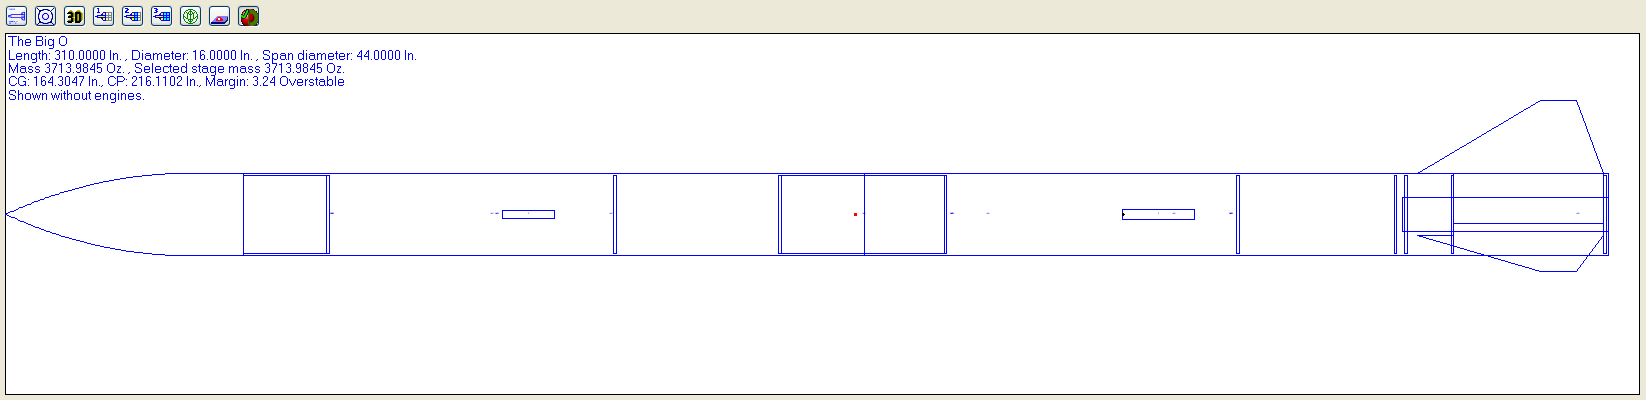
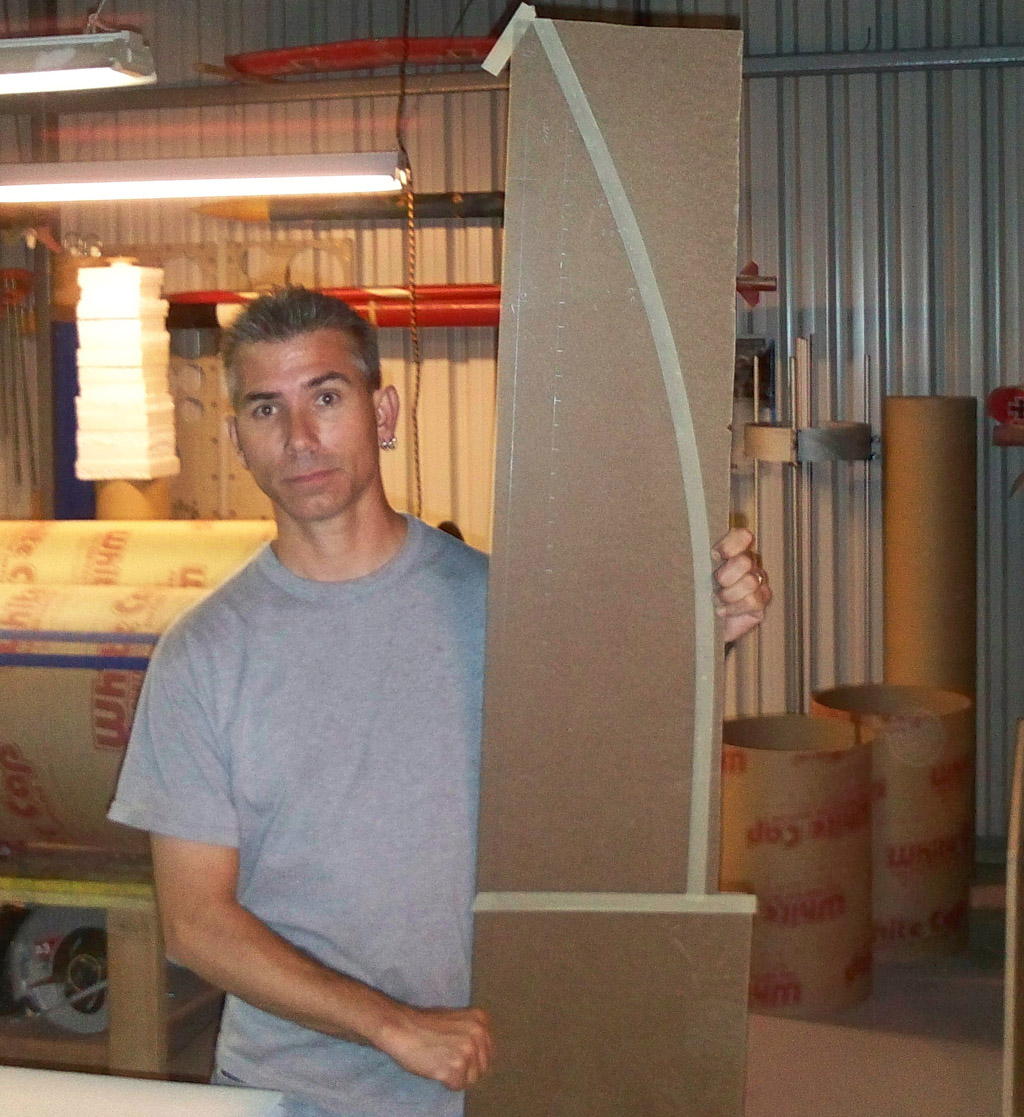
A project of this size requires much planning if it's going to be successful...Dwain is pretty much taking care of the design features. Between 2008 and 2010 I gained some large-scale rocket experience working on my own Level 3 Mighty Moe project and on the upscale Cherokee-N project with the Rocket Doc. Besides helping with general construction, I offered to make the nose cone in a similar fashion as I did for the Cherokee-N. Since the initial discussions, Dwain has changed the fin design to what you see in the RockSim screenshot below. And now they are made out of wood and not fiberglass as originally envisioned.

Some of the design features for the Big O include:

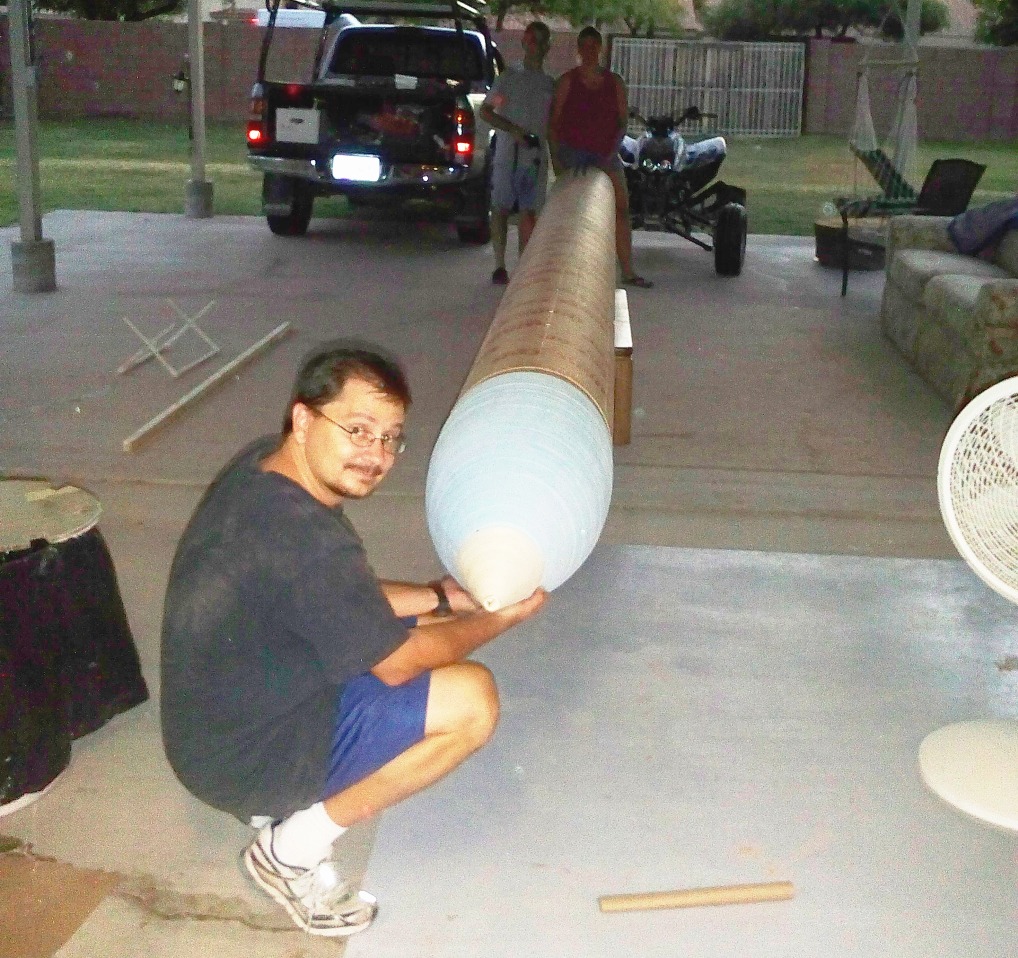
- Modular design for ease of transport and assembly, as well as multiple launch configuration possibilities.
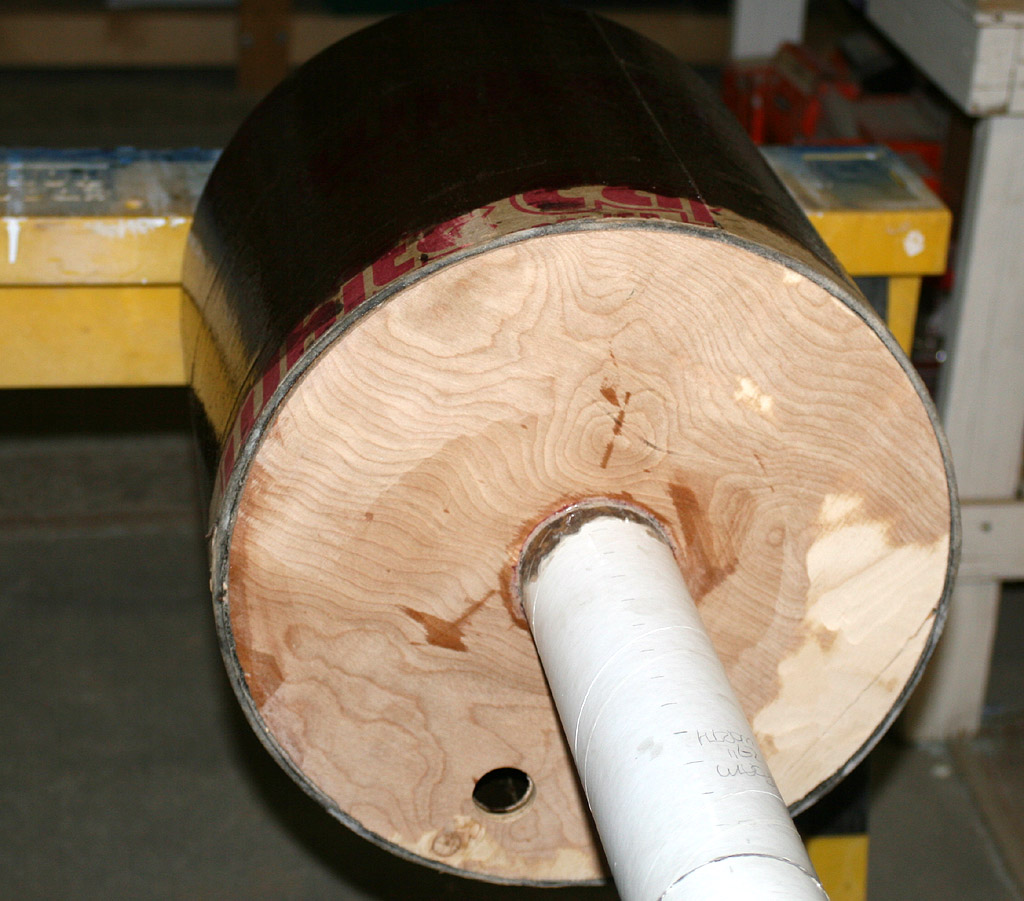
- Long carbon-fibre 150mm (six inch) motor tube so the rocket can fly on the most powerful "O" motor in the current Cesaroni catalog: the O8000.
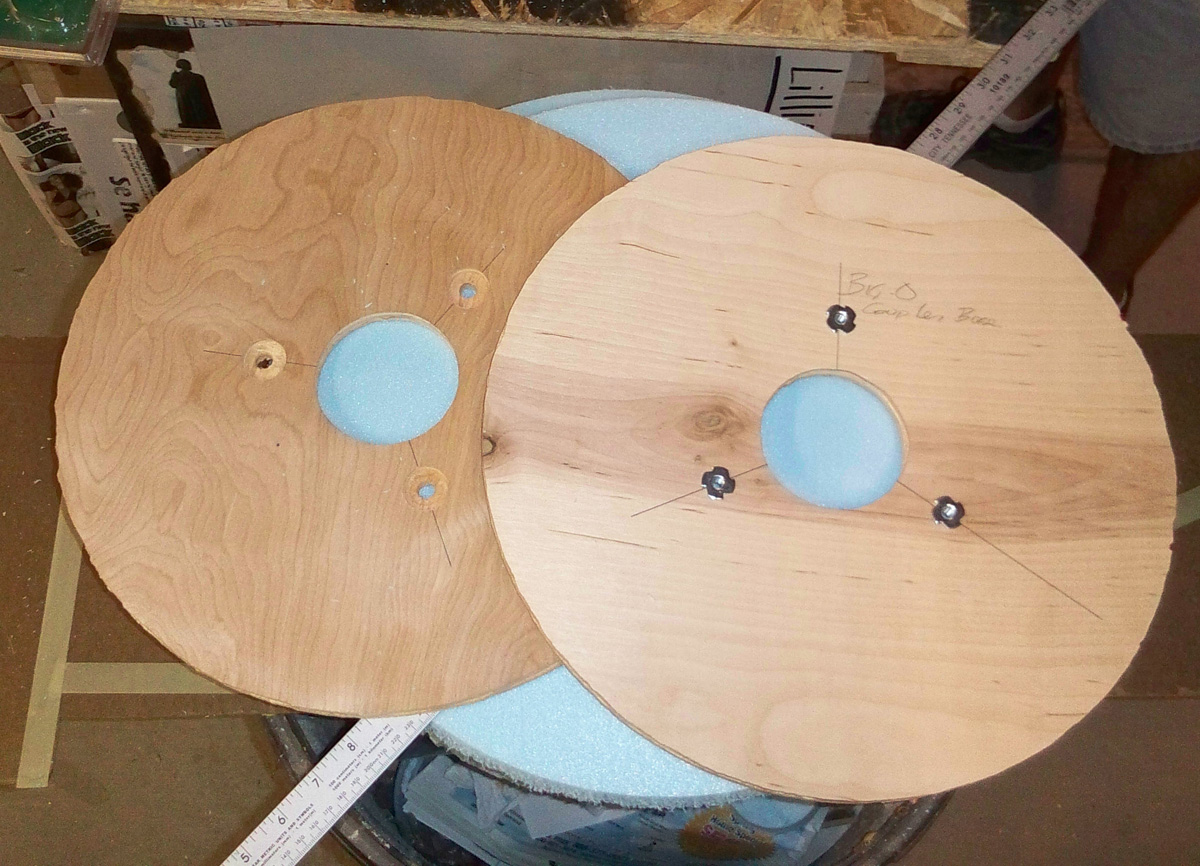
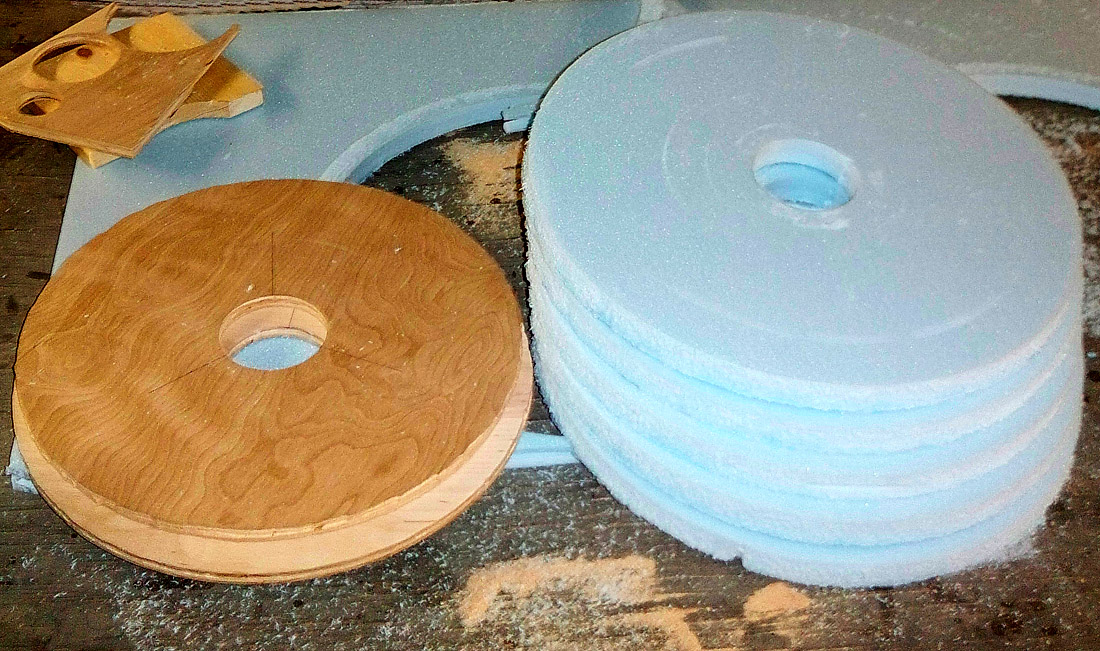
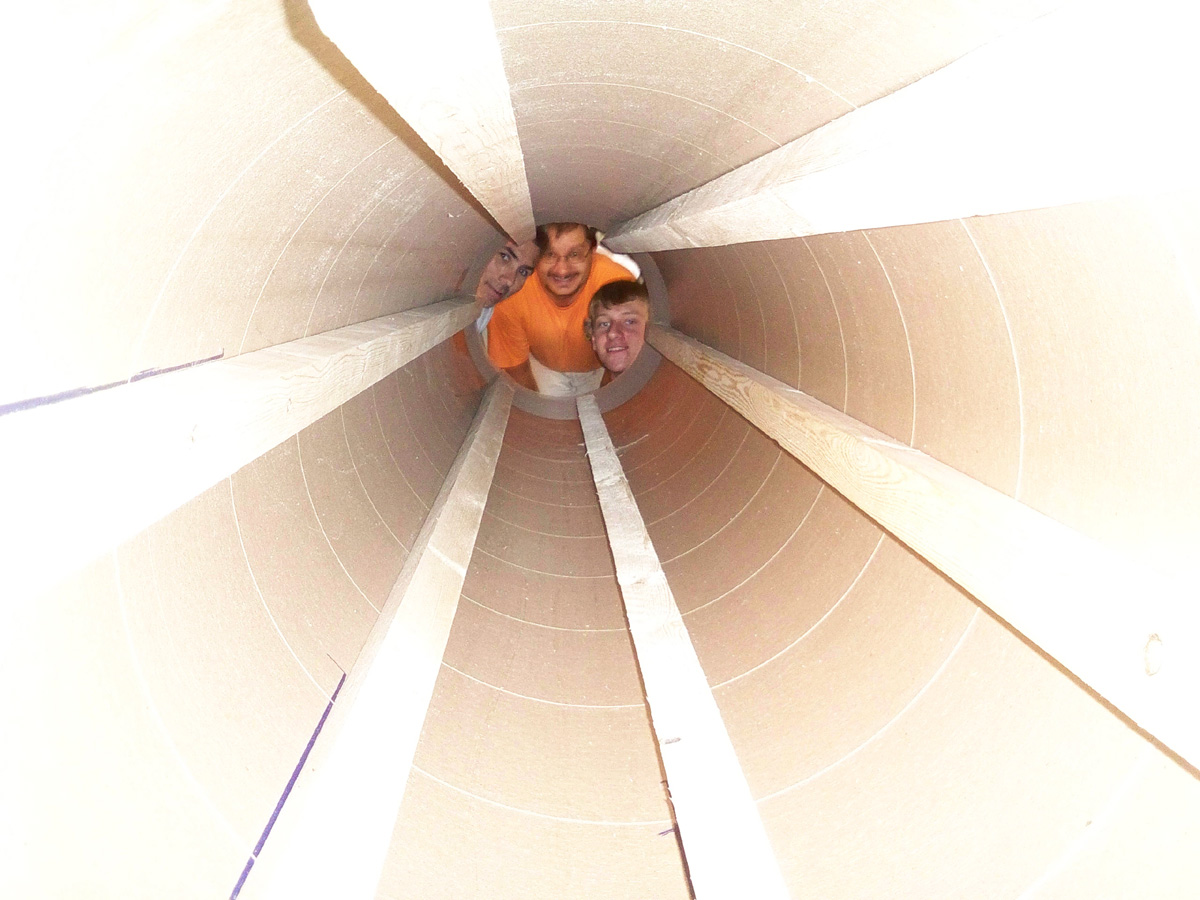
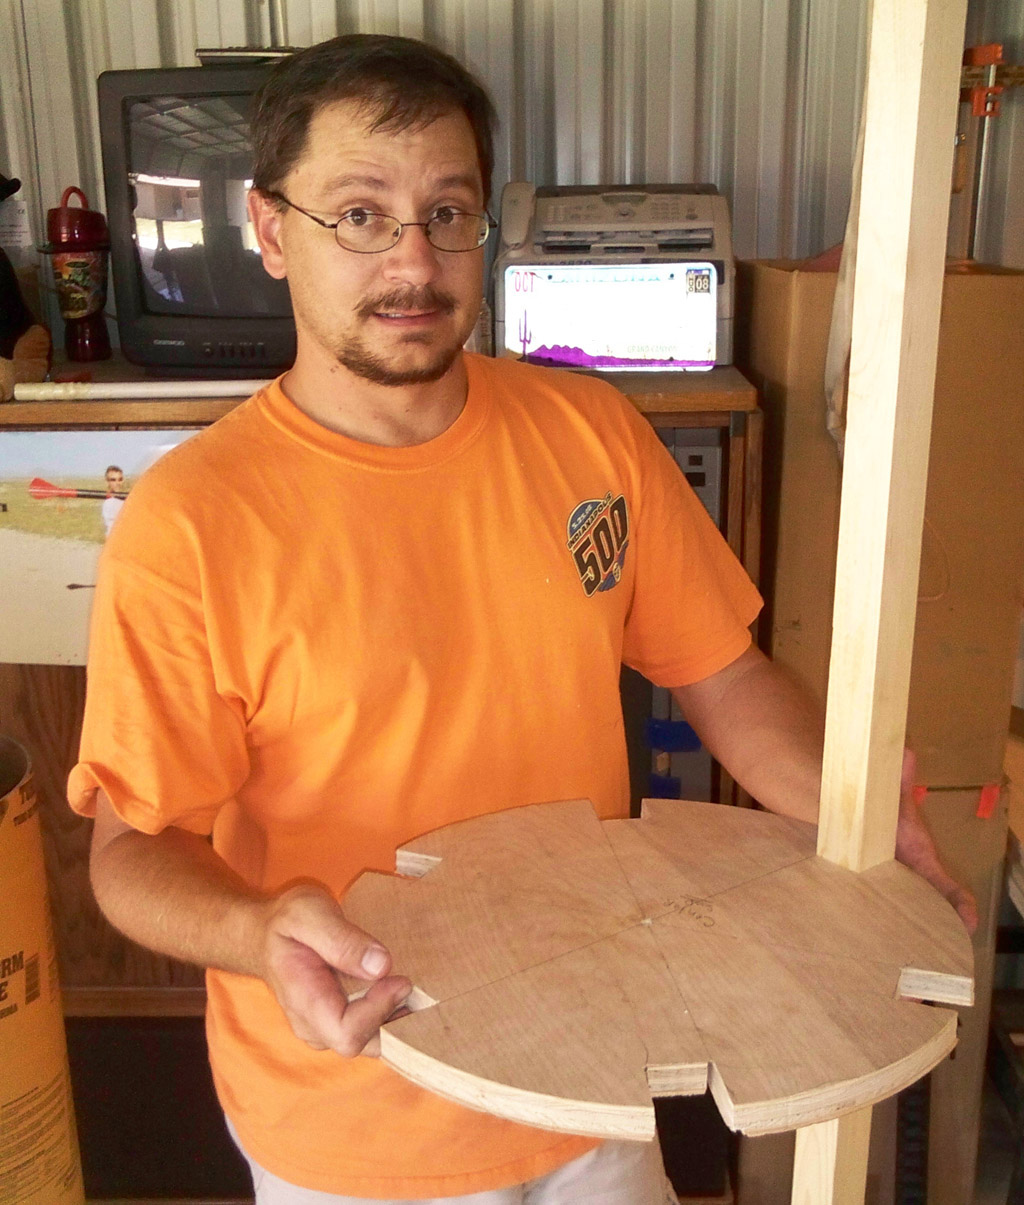
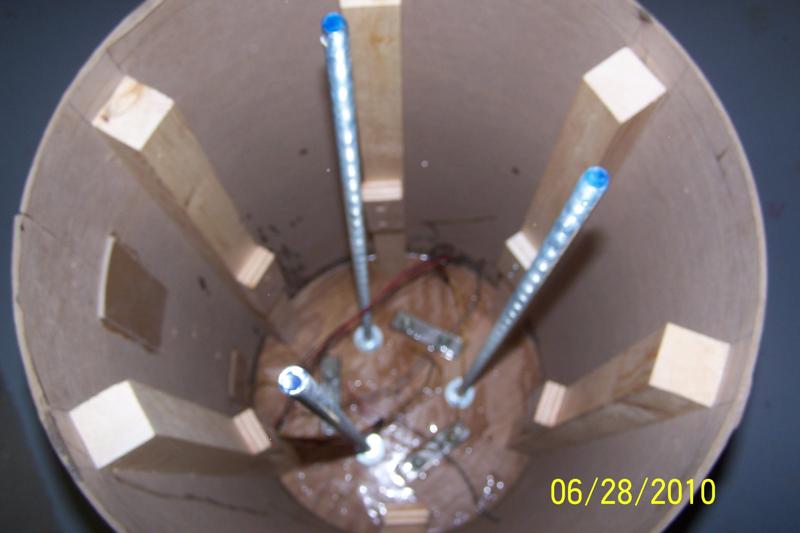
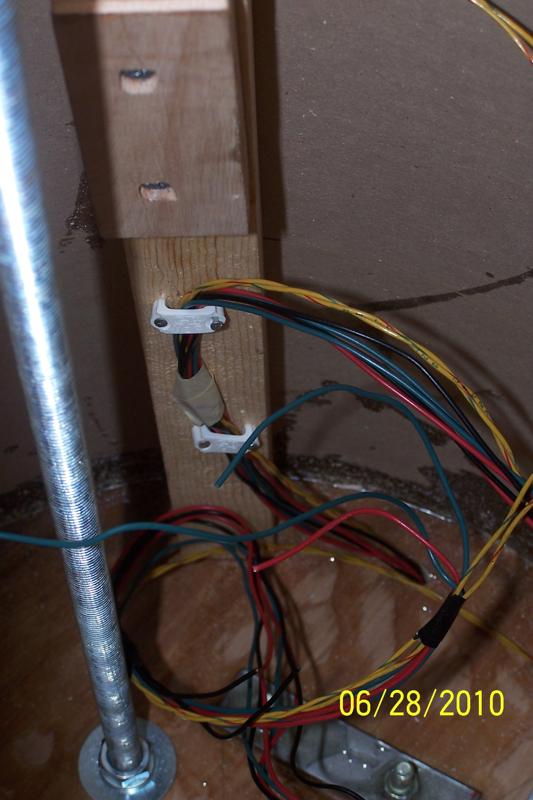
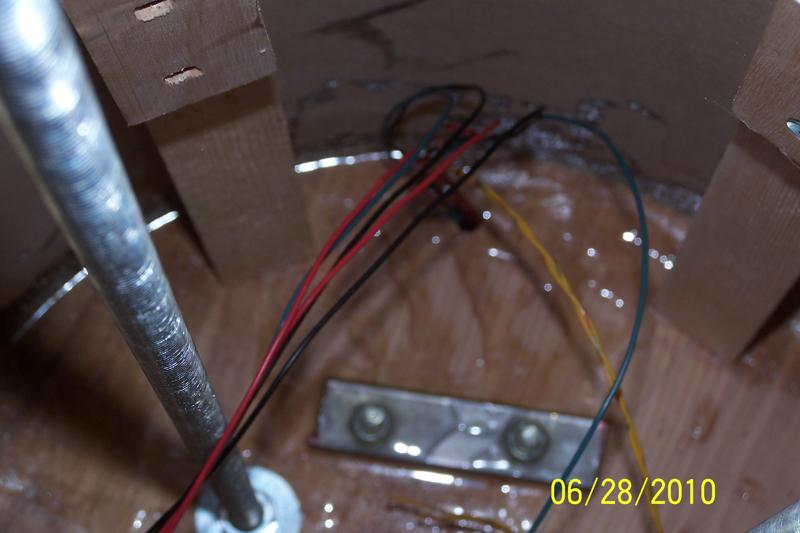
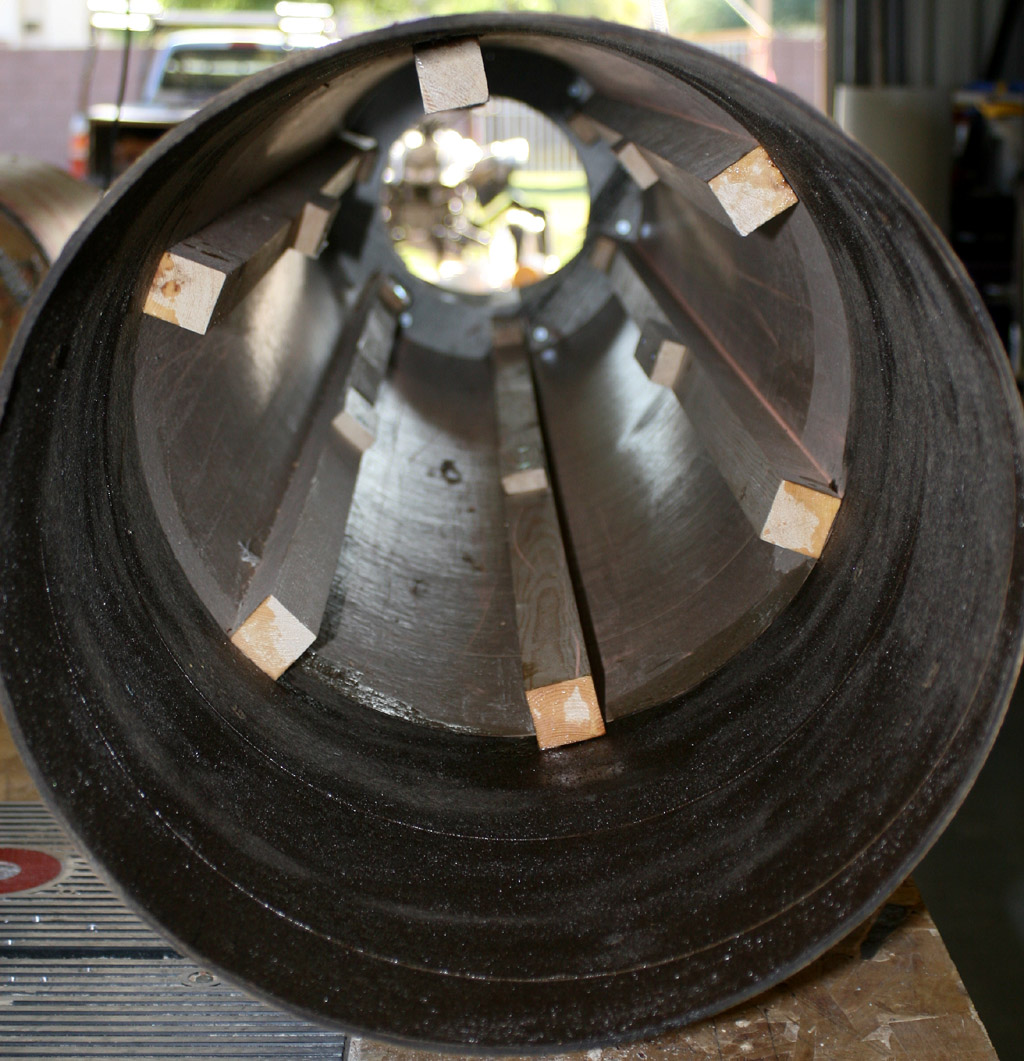
- Internal load-bearing structure throughout.
- Onboard video.
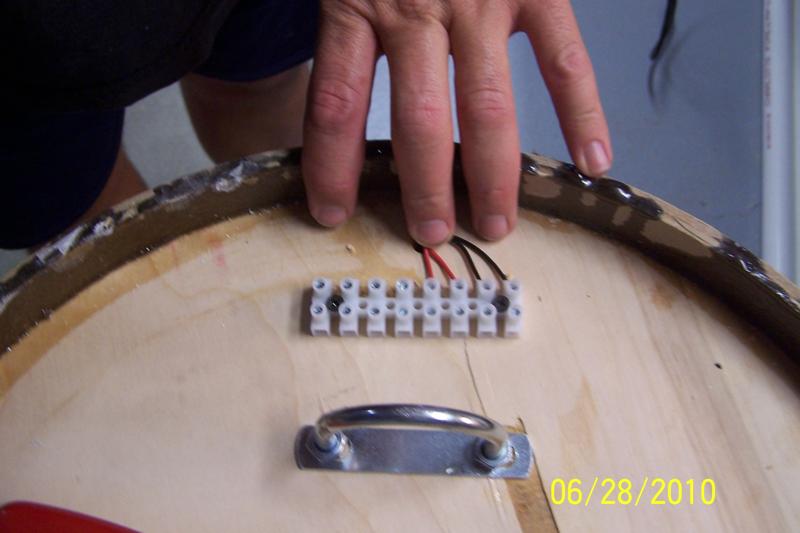
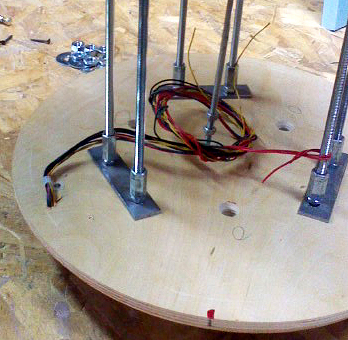
- Quadruple reduntant electronics and ejection charges.
- Custom WWII bomber-style "Nose Art".
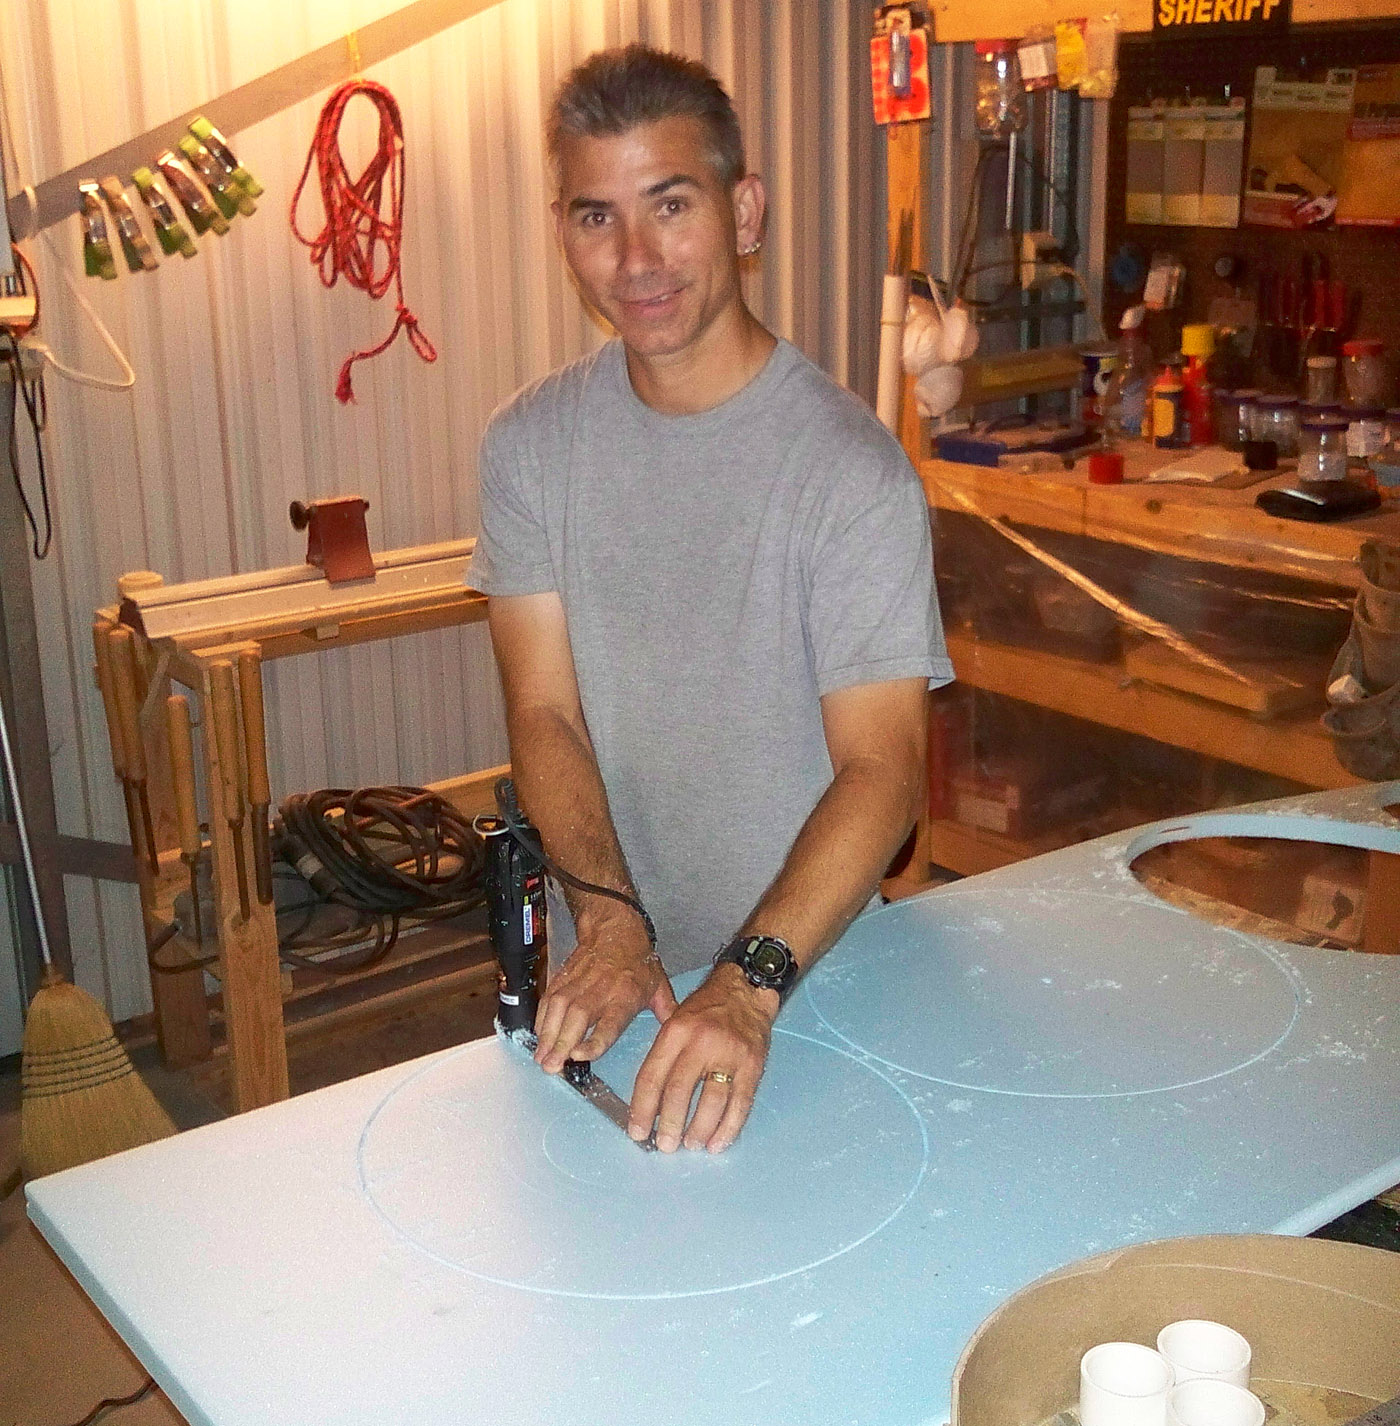
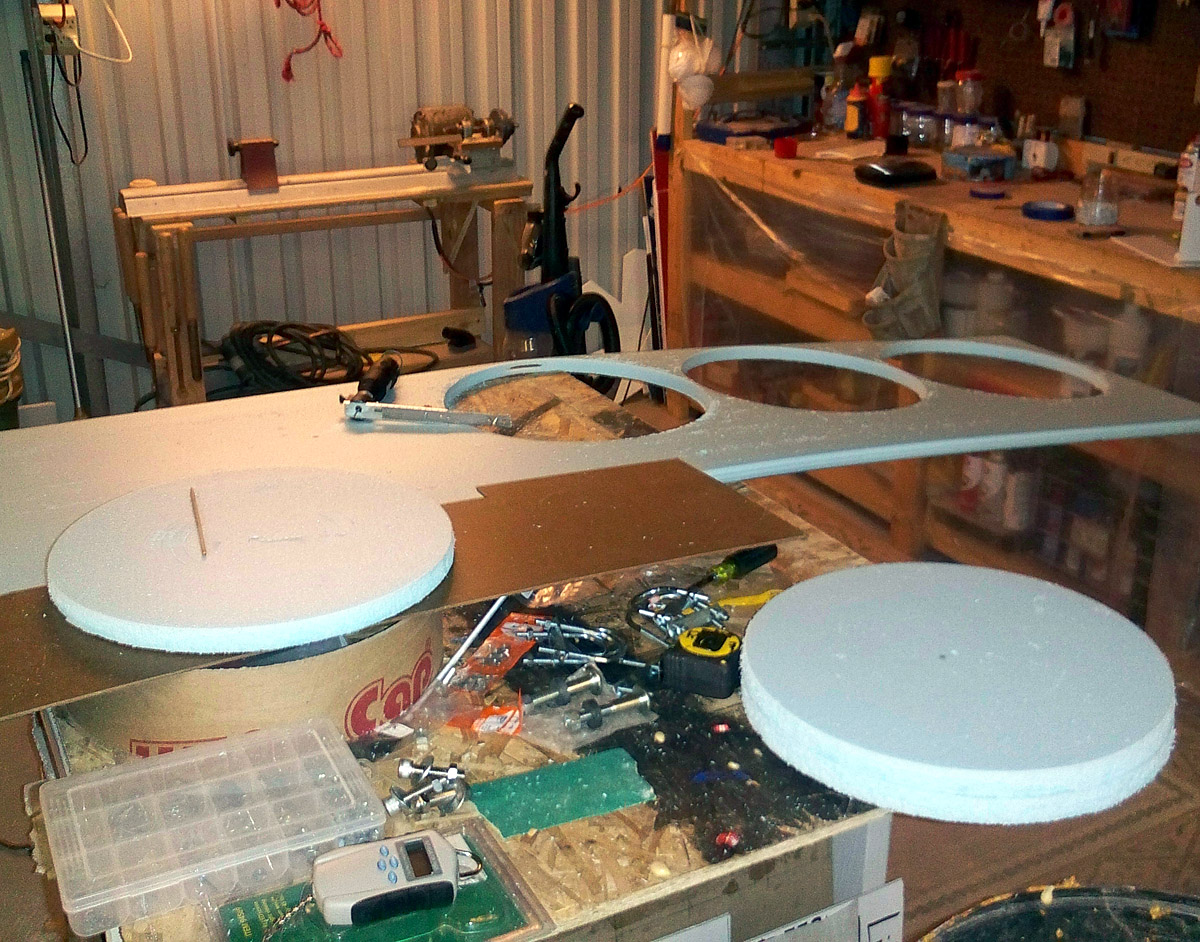
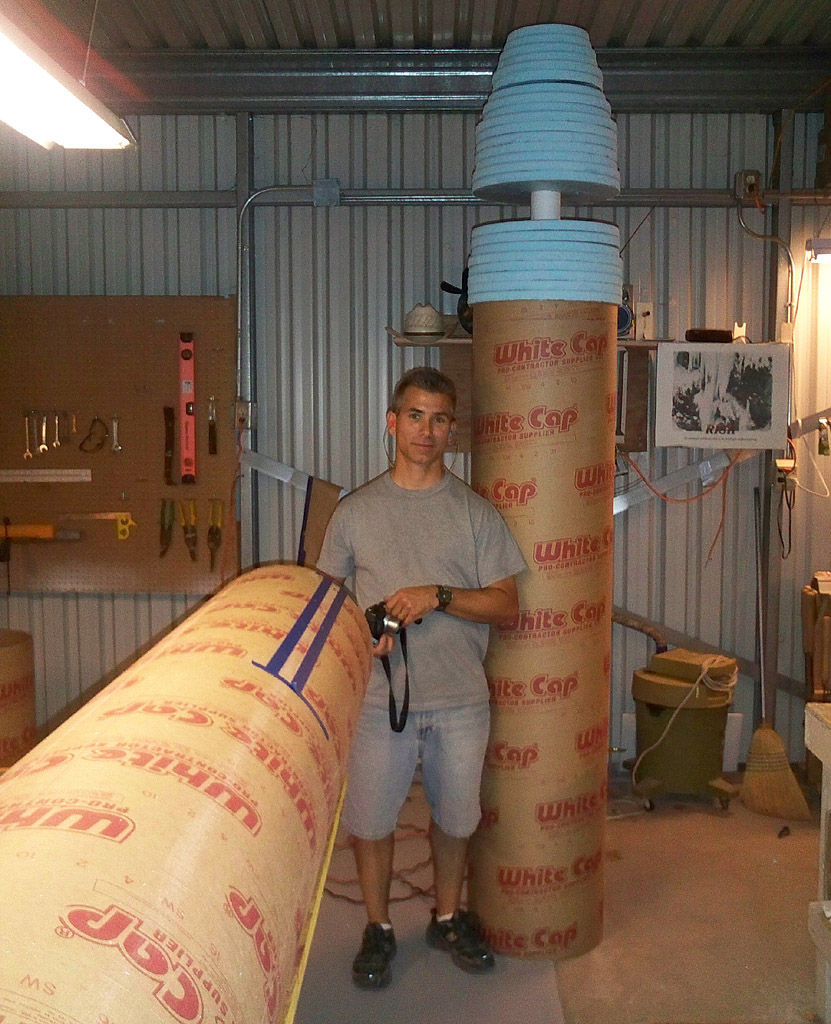
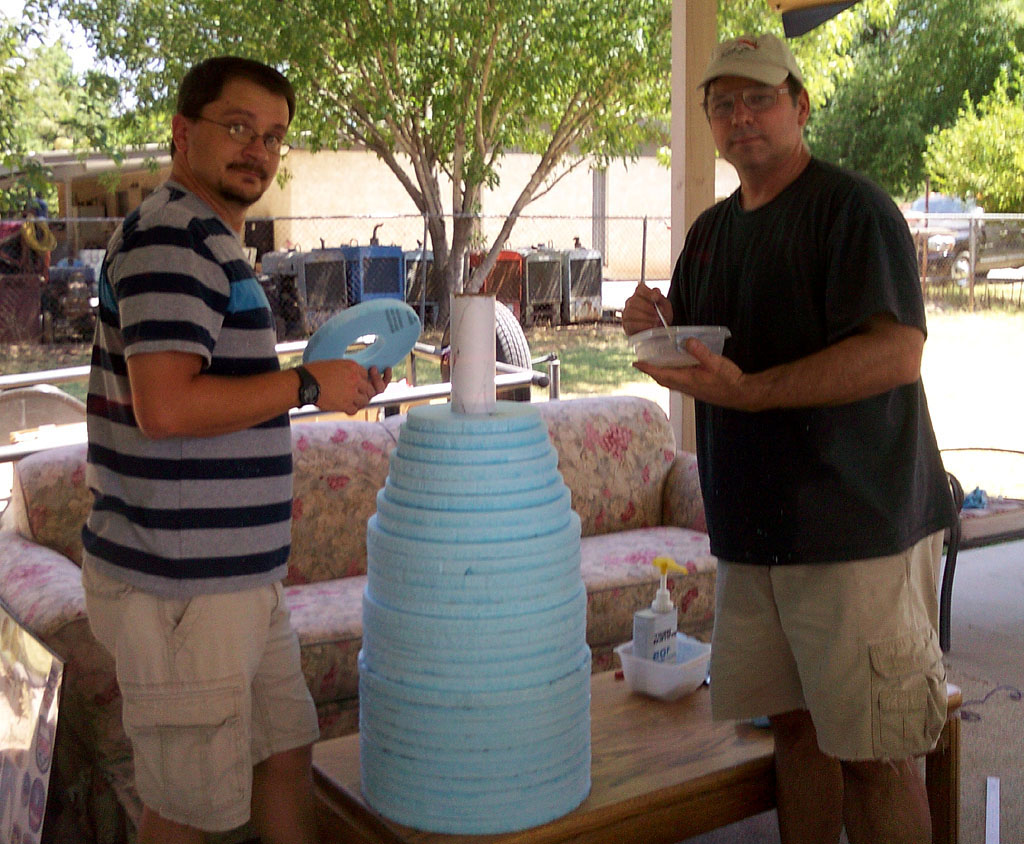
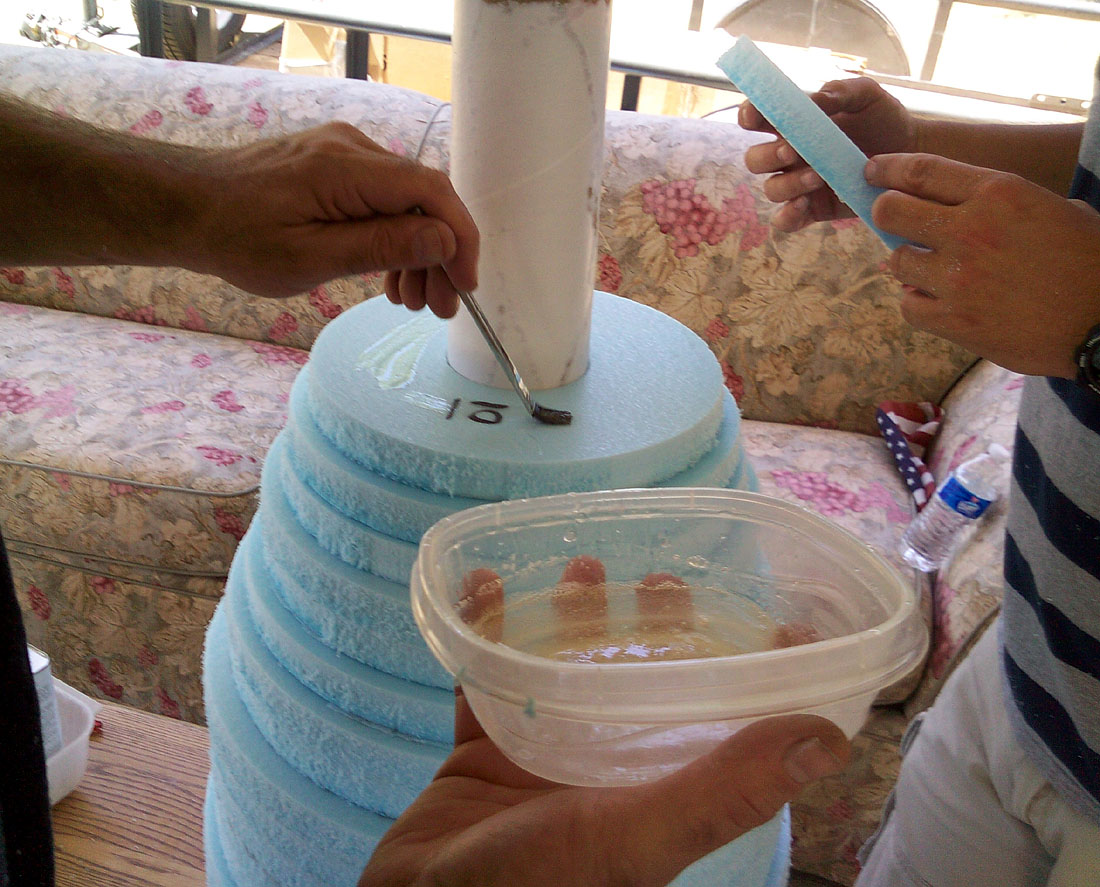
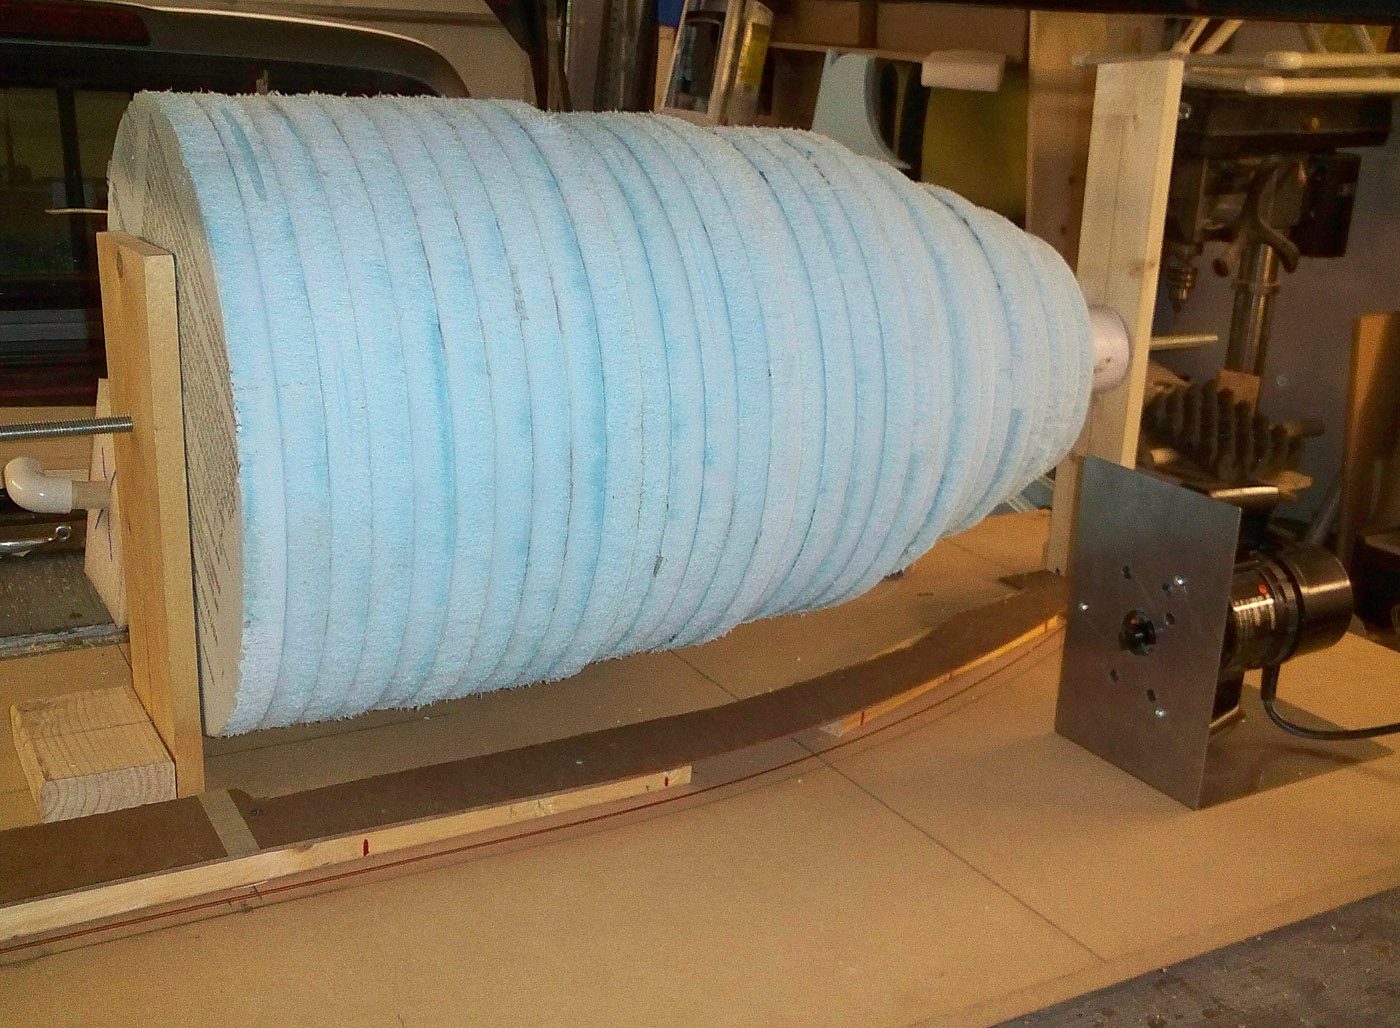
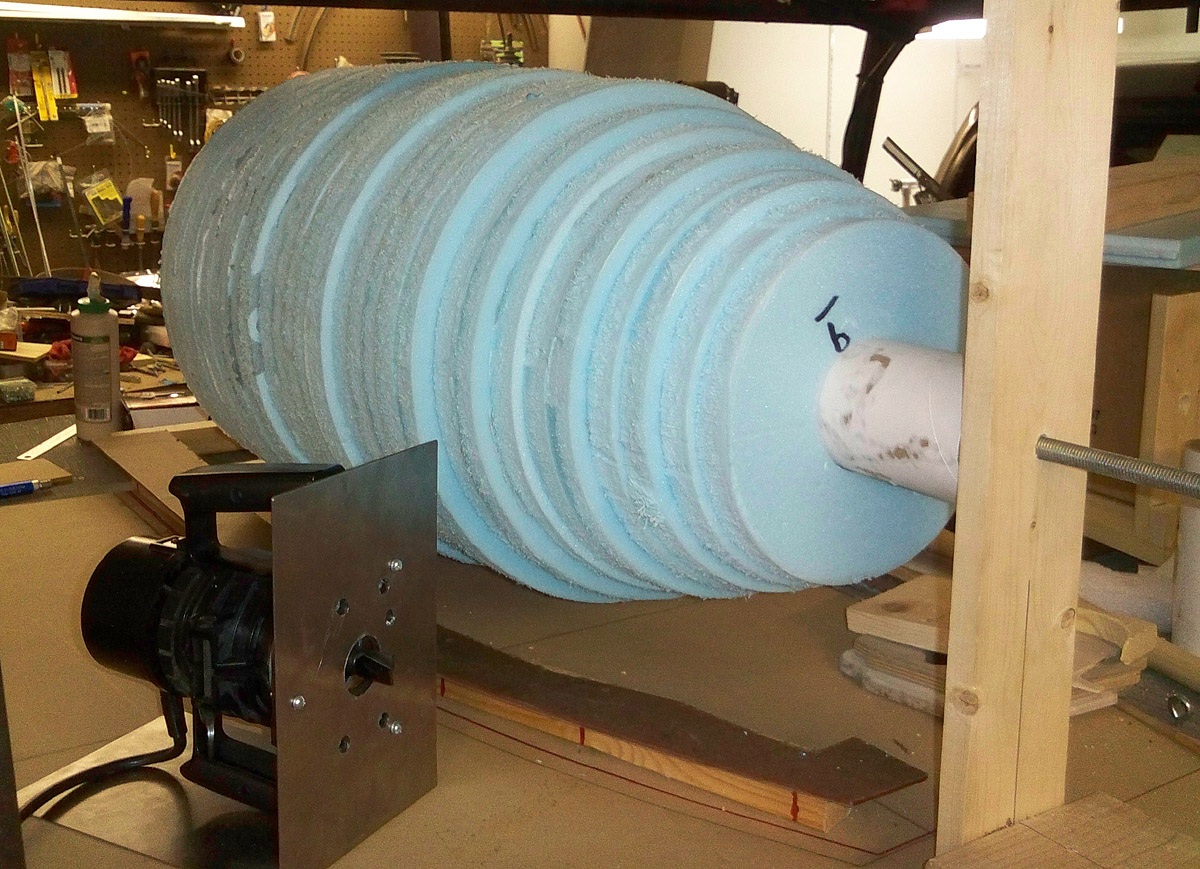
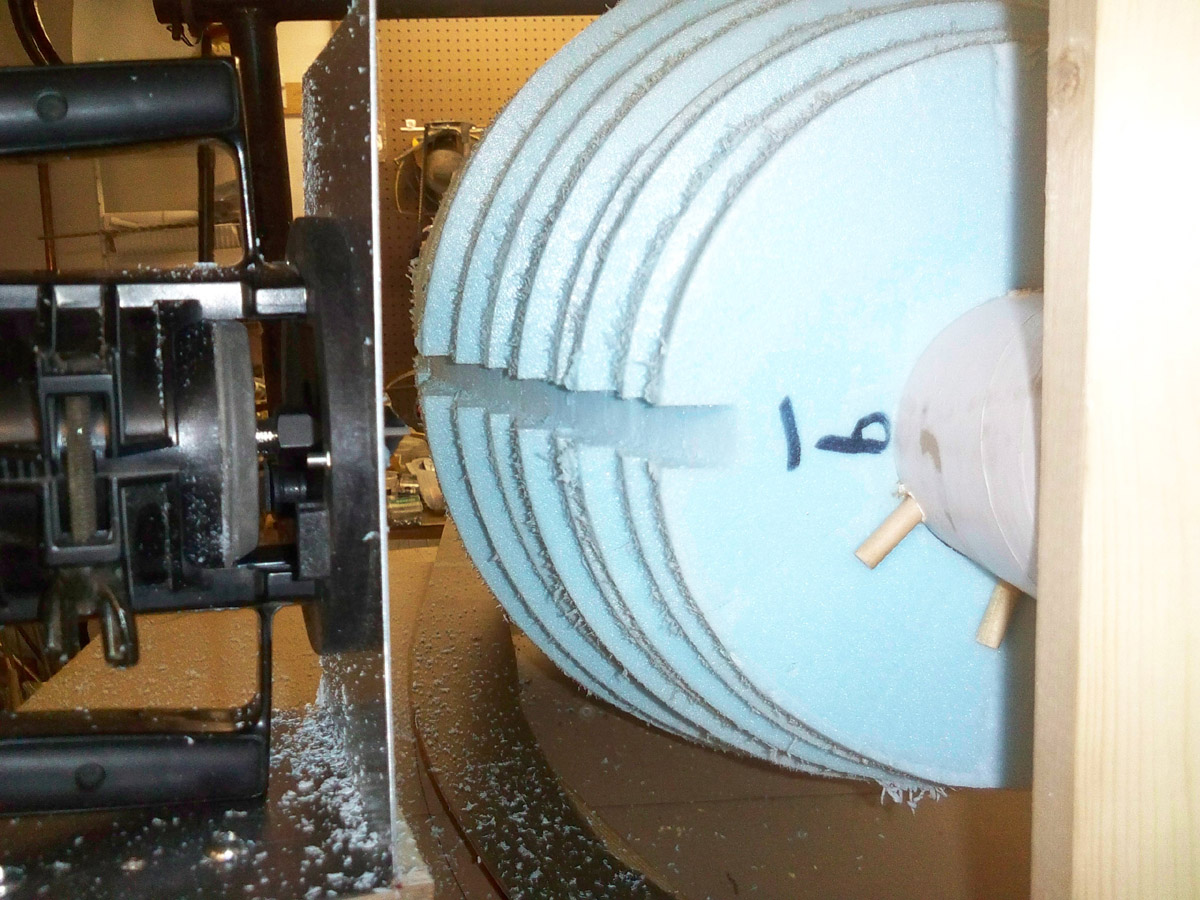
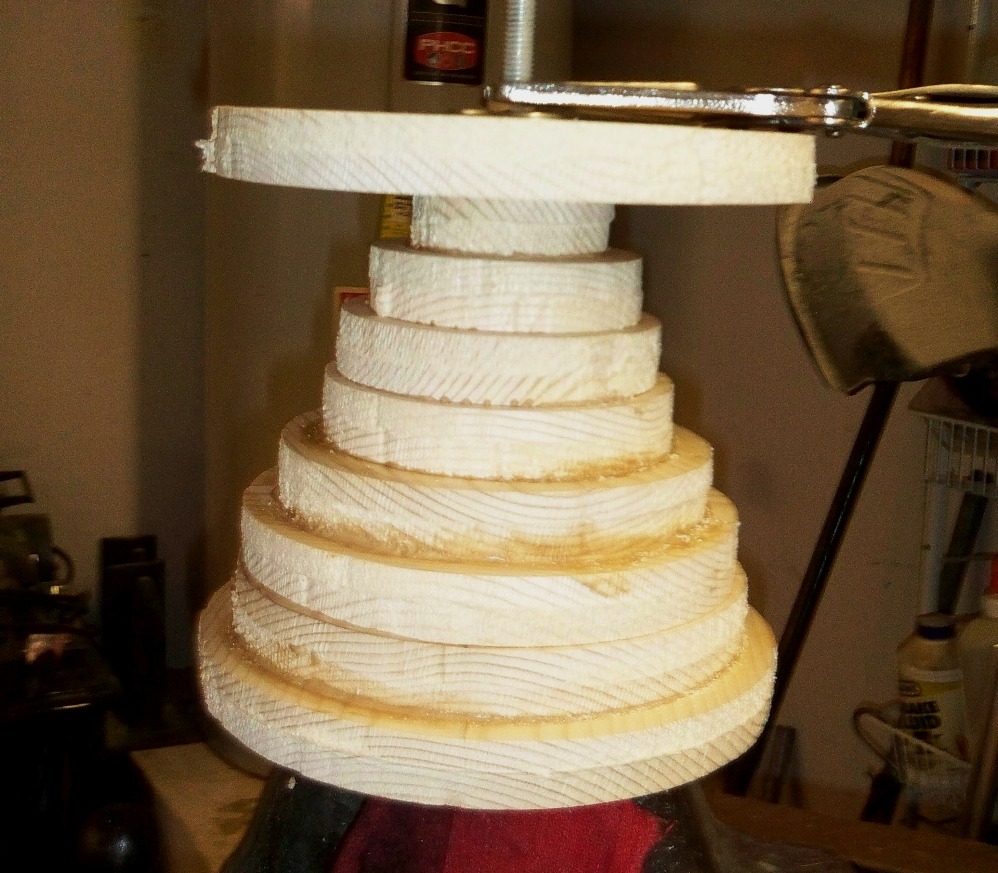
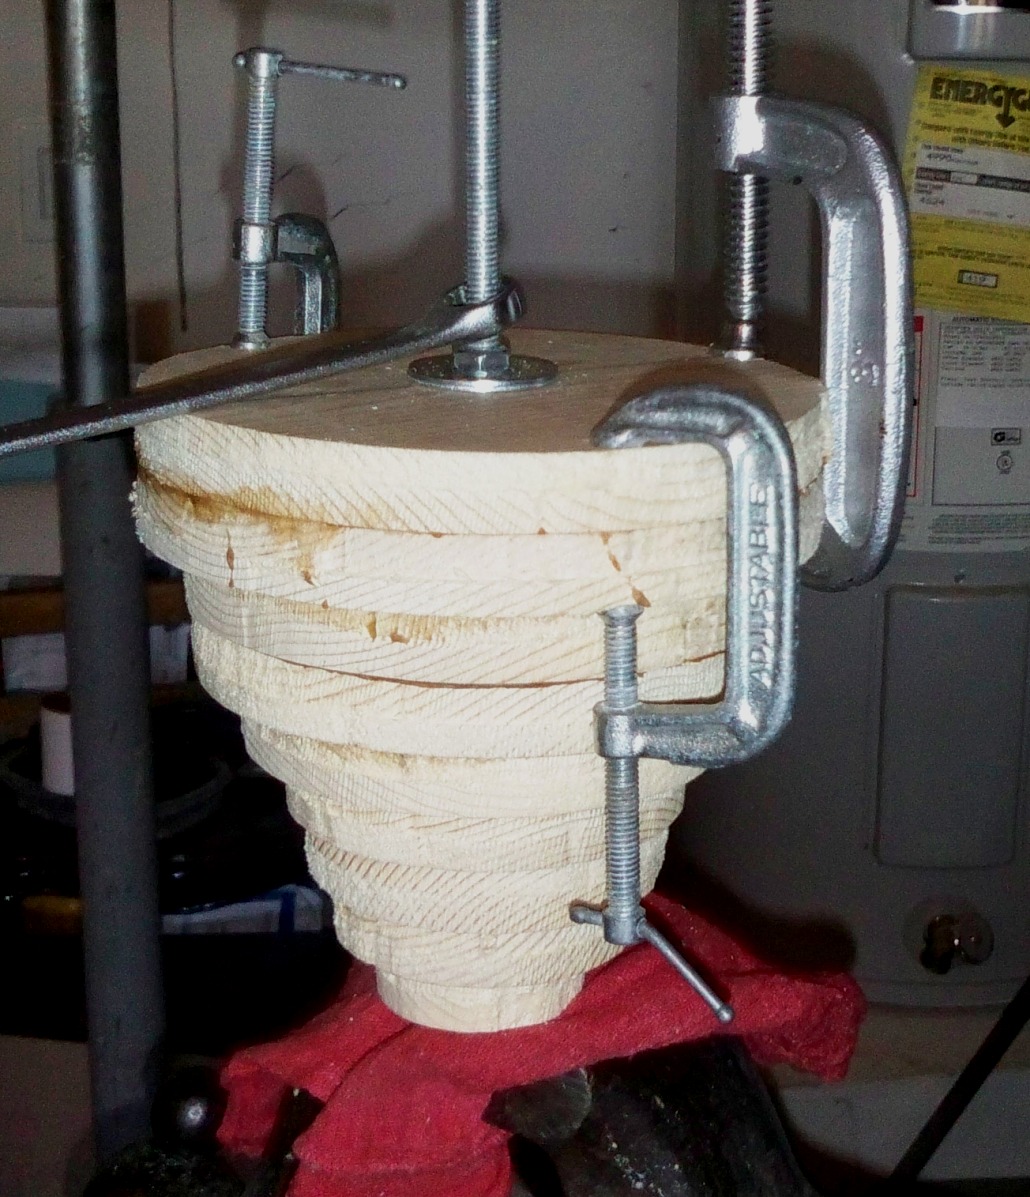
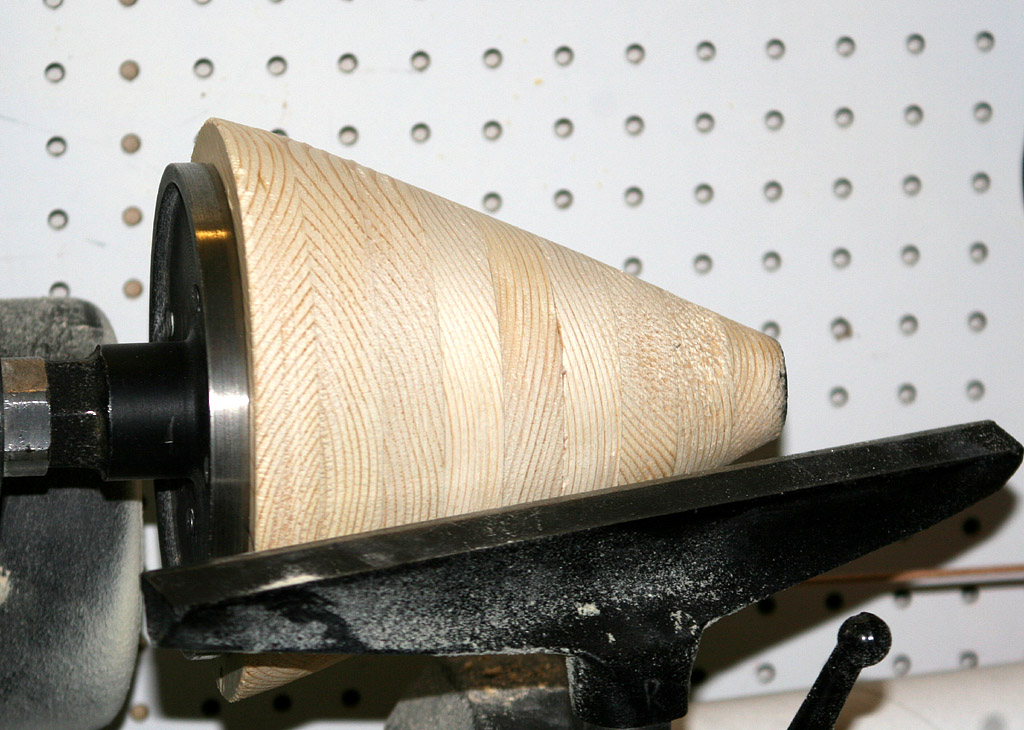
- Custom nose cone. Click Here for my tutorial page on making large nose cones.

Click here to download a PDF file of the Pro 150 motor dimensions.

Below is a screen shot of the Rock Sim file of the Big O.


21 Jun 10
Monday night I went over to Rick's since Dwain was heading over there as well. While there I picked up the nose cone shoulder Rick made from the 16-inch concrete tube. He did a great job squaring it up and even epoxied the internal tube doubler inside.

The centering rings / bulk plates for this rocket are larger than the stock Circle Cutter can handle so today I fabricated an extension for my Dremel Tool Circle Cutter. I got a 1-inch wide piece of 1/8-inch steel bar stock and ground the edge of it down to a width of 7/8" so it would fit in the Circle Cutter guide. Then I drilled and tapped a couple holes in it for the tightening knob. Finally, I drilled and tapped the pivot point for a 1/4-20 screw. This is an upgrade from the 1/8" diameter pivot point on the stock Circle Cutter.

After making the extension I proceeded to cut the first two nose cone shoulder bulk plates from 1/2-inch birch plywood. The first one I cut came out just a bit small so it became the internal bulkplate. The second one came out just about right. After cutting the outside diameters, I adjusted the Circle Cutter to cut the 3-1/4" diameter central holes for the core tube. Both these rings get bonded together and so become the end plate for the bottom of the nose cone shoulder.

The central core tube in the nose cone can be used to hold weight (a six pack??) for Center of Gravity adjustments and requires a cover plate where the tube extends through the bottom nose cone shoulder bulk plates. Before bonding the rings, I measured and drilled three holes for 1/4-20 tee nuts to retain the cover plate. I sandwiched the tee-nuts between the rings and bonded the rings together, clamping them together in a bench vise while the glue cured. At the same time I mounted three 5/16-inch u-bolts for redundant recovery system attachment points.


- Dwain and Rick with the two 12-foot long airframes.
- The mating surfaces of the lower nose cone shoulder bulk plates before bonding. The tee-nuts are for the securing the plug.


22 Jun 10
Tuesday morning I cut out the first five circles of blue foam for the nose cone. I decided to try and use my Dremel tool with Circle Cutter attachment versus using a coping saw. The Dremel method worked like a dream and made really quick work of cutting the foam circles.


-First 5 foam rings for the nose cone, plus the first two nose cone bulk plates.

Tuesday evening I went over to Rick's place to drop off the plywood sheets for the fins and some of the centering rings. While I was there Rick and I managed to cut out the remaining 24 pieces of blue foam for the nose cone. Using the Circle Cutter really made this task about as simple as it can be.


- Rick cutting cone circles.
- Some of the circles.
- Rick stacking the cone.
- Some of the major components.
- Rick displaying the cone profile.


24 Jun 10
Met Dwain over at Rick's place to work on the nose cone. Using a minimal amount of West System slow cure epoxy between layers, we laid up the cone pieces on a temporary piece of 3" mailing tube. I'll use this tube as the central support while turning the cone down to the final profile.


- Dwain and I laying up the cone.


25 Jun 10
Sounds like a broken record, but again I met up with Dwain over at Rick's place to do some more work. For one, I transported all the 2x2s over so we could start installing them in the upper airframe. One of the tasks I worked on was adding the internal fillet of epoxy & filler to the inside of the nose cone shoulder.


- Looking into the nose cone shoulder from the rear. Epoxy/filler fillet has just been applied.
- Dwain freakin' laying down on the job. Oh well, it's his rocket.
- Rick, Dwain, and Shon peering down the 12-foot length of the upper airframe tube. Six 2x2s have been added for internal strength.
- Dwain showing how internal 3/4" birch (as well as honeycomb) centering rings will interface with the 2x2s.


26 Jun 10
All day today I've been working on getting the nose cone turned. I had to fabricate everything you see in the photo: New table, uprights, profile piece for the nosecone, and jig for the router.


- The cone mounted on the turning table. It's basically a manual rotisserie.
- I had to fabricate a new jig for a router. The bit is a 3/4" straight cut bit. The router will get mounted on a stand to bring the center of the cutter up to the same 10-inch centerline of the cone. Pretty soon the garage will be filled with blue foam bits flying everywhere.
- Router bit.

Ok, I got everything prepped to begin turning the cone. Below are some pix of the progress.


- The first cut with the router. The first pass is just to remove some foam down to about 3/8 inch away from the finished diameter.
- Part way through the first pass over the cone. I think it is easier to spin the cone versus going horizontally for each pass.
- The first pass is complete. Adust the router in about 3/8 inch and start the finish pass.
- The finished foam portion of the nose cone. I think there is more blue foam on the floor than is in the cone.


27 Jun 10
Got up early today and hit the garage for some more work on the nose cone. My goal today was to get the wooden tip assembled and ready for turning on the lathe. I used the Dremel and Circle Cutter to cut appropriately-sized discs from 3/4" thick pine. I made eight discs and glued them together with wood glue. Like most of my wooden cones, I drilled a center hole to accept a piece of all-thread rod. I clamp one end of the rod in the bench vise then stack the wood discs, glueing them together as I go. Then I put a larger wood disk on top, a couple of washers and then a nut. I tighten the nut to compress the discs together and let the glue cure under pressure.

For this nose tip I decided to do the cone and shoulder separately. While searching around the garage, I found a suitable shoulder already made. Apparently I'd made a nose cone for a three-inch rocket but decided not to use it. The shoulder of this cone was a perfect fit inside the core tube for this rocket. The shoulder was only a couple inches long, so I chucked it in the metal lathe and proceeded to remove the material above the shoulder, effectively making a shoulder at least twice as long as before. I also came up with a way to make it so we could screw the hole nose cone in place and remove it as necessary. I found a couple of wood discs laying around that nearly fit inside the core tube. A bit of work on the belt sander and they fit perfectly. I drilled the central hole to accept a 1/4-20 tee nut and pounded it home. On the mating disc, I recessed the center hole with a spade bit so it would clear the tee-nut. I used wood glue and clamped the discs together. Meanwhile, I got a piece of 1/4-20 all-thread and ground one tip down to a blunt point. I did this so it would find the tee-nut easily. I cleaned up the threads with a 1/4-20 die. In the shoulder from earlier, I tapped a central hole to accept the 1/4-20 rod. I cut the rod to about 3 inches long and filled the hole with wood glue. I threaded the rod in and squirted a bit more wood glue in the hole from the opposite end. By this time the discs with the tee-nut were already set so I screwed the all thread into the tee-nut in the discs and place the whole assembly into the core tube so the glue holding the all-thread in place would cure while everything was lined up. Eventually, I'll epoxy the discs into the core tube at the proper depth, thus providing a threaded receptacle for the entire wooden nose tip. I'll wait to do this until after the foam nose cone is complete just in case we need to run a pole through the entire core tube for support while glassing or painting.

The method for securing the nose tip to the shoulder is simple. The 3/8" all-thread rod in the wood tip is permanent. I sawed off the lower end of the rod leaving about three inches exposed. I drilled a larger diameter hole in the top of the shoulder (opposite the 1/4-20 rod at the bottom.) When it comes time to mate them together, the shoulder will be inside the core tube, flush with the top. I'll pour epoxy into the larger hole in the shoulder and place the wood tip with the 3/8" rod into the epoxy in the top of the shoulder. When the epoxy cures, I'll have a nose tip with a shoulder firmly attached with epoxy.

Late this afternoon, I removed the wood tip from the vise. I decided to attach one more wood disc to the bottom so I glued that on and clamped it. A few hours later I was ready to put this baby on the wood lathe and get it ready for turning. I took the face plate off the lathe and marked off the eight attachment points. I pre-drilled the holes and used drywall screws to secure the faceplate to the bottom of the cone. Simple matter to re-chuck the whole assembly on the lathe, set up the tool rest and start it spinning. Within a few minutes I had it roughed out so it resembles a tapered cone...and with that it was time to quit for the night.


- I think I need to re-check my math.
- Pine discs glueing together to form the nose tip.
- Added another pine disc to the bottom for some additional length.
- The nose shoulder as it will go into the rocket. The piece on the bottom will get secured in the core tube. It is threaded to accept the 1/4-20 rod in the shoulder proper.
- Partially completed nose tip on the wood lathe.

All-in-all it was a very productive weekend...hell, a very productive week for that matter. My parting words on Friday when I left Rick's place was that we'd have a nosecone by the end of the weekend. I came pretty close to meeting that goal. And from the looks of the photos Rick sent me on the phone, he made some serious progress as well.


28 Jun 10
This afternoon I made yet another trek to Rick's place to continue working on the rocket. I loaded up the nose cone pieces in the truck and headed down there. Dwain was just getting back from Radio Shack to pick up some wire and terminal strips. He'd been working on wiring up the e-bay. Then came the discussion between all of us on how to secure the e-bay together. I offered up a suggestion on a way to make it as strong as possible: three all-thread rods securing the bulk-plates together. I also suggested one way to mount the electronic sleds by extending the recovery harness u-bolts downward. I offered to go to Home Depot and pick up the necessary hardware and head back to my place for some construction supplies. By the time I got back, the guys had drilled most of the required holes so it was a matter of getting the hardware in place. I needed to cut the u-bolts down a bit so they were about the same length. I have some all-thread couplers (one-inch long) I threaded onto the ends of the u-bolts and then some 16-inch long 5/16" all-thread was threaded onto those. As of right now, these are our e-sled mounts.

While at Home Depot I picked up three 36-inch long pieces of 1/2-inch all-thread and matching nuts, washers and lock washers. Dwain and Rick drilled the permanent bulk-plate for the all-thread while I prepped the all-thread. In no time, they had the all-thread mounted to the bulk-plate with nuts, washers, and lock washers inside and out. Next came a test fit of the internal coupler bulk-plate that serves to reduce the volume of the e-bay. It fit great and when it was in place, we installed the upper bulk-plate. It all fit together very nicely considering we didn't originally drill all three bulk-plates together. Rick hoisted the e-bay up and onto his scale: 29 lbs 11 ounces. This is not a light e-bay by any means, but considering it ties the upper and lower airframes together it needs to be strong.

Final task Rick and I finished off was to coat the outside surface of the permanent bulkplate with Sticky Stuff resin.


- Looking down into the e-bay with the three 1/2-inch all-thread rods installed.
- Some of Dwain's wiring of the bottom bulk-plate.
- Some more of Dwain's wiring.
- Top of the bulk-plate during wiring.
- Dwain with the rocket airframes and nosecone assembled for the first time.


29 Jun 10
Tuesday afternoon and more work at Rick's place. Just some minor tasks accomplished today: Resin the outside of the nose cone shoulder; resin the inside ends of one of the upper airframes and the inside joint of the e-bay; Rick wired up the top bulkplate for the e-bay; we back-stepped a bit and resined the inside joint of the nose cone shoulder...something I'd forgotten to do Saturday night.


- Dwain chillin' with the e-bay.
- Dwain and Rick applying West System and fiberglass to the inside seam of the e-bay.
- Resin applied on the inside of one end of upper airframe.
- Resin applied on the outside of nose cone shoulder.
- Resin on the inside of the other end of the upper airframe.
- Rick's photo of his bulk-plate wiring.
- Hole we had to cut in the nose cone shoulder to pour resin on the inside seam.


Below is a table listing most of the many sources we've tapped into while building the Big-O.

My Dad:
Continuing Love and Support
Apogee Components (RockSim)
Design Software
PerfectFlite Electronics
Primary/backup altimeters
Missile Works
Secondary altimeter
What's Up Hobbies
150mm Motor and Hardware
& nylon shock cord
Sticky Stuff Sales
Resin/epoxy accessories
West System
External resin/epoxy
Microfasteners
Nylon shear pins
The Home Depot
Misc. hardware
Lowe's Home Improvement Center
Misc. hardware
For questions or comments, feel free to email me at: E-Mail Moe!